The White Family
Homestead


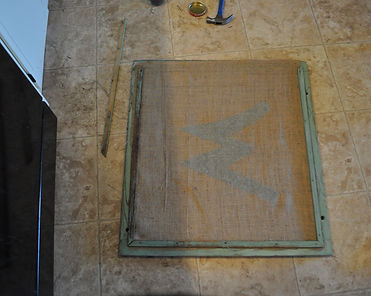
This is the frame the way we bought it.

Stencil process


Stapling it in place.
Putting the trim back on.
Monogramed art
A few months back my husband and I went on a date night. We don’t get out much so we try to do something besides dinner and a movie. We went to a local antique/craft store and searched for something under $10 to decorate the empty walls in our house. Even though we saw something that caught our eye when we first walked in we made sure to scope the whole place out. Our treasure we found was an old teal window type frame that had hard plastic in it.
As soon as I saw it I knew what I wanted to do with it. My plan was to put burlap in it and monogram it with some paint. The plastic was nailed in with a piece of trim. I carefully removed the trim using a hammer and pliers. When I pulled the trim off I made sure to lay it out next to me in the same order it came of so that when I put it back on it matched up.
The burlap I planned on using had been folded up so I took out my iron which is rarely used, mostly for projects not for pressing clothes. I used a spray bottle to dampen it and the iron did the job of getting out the creases. I measured my opening in the frame a few times. Why more than twice? Because I can always hear my husband saying “measure twice cut once.” I wanted to triple check that my measurements were correct since I didn’t have an abundance of material. I made my cut and then laid it on the frame and it was right.
I had a pretty good size of cardboard to make the stencil out of. I was going to try to print out a big stencil but truthfully I didn’t want to piece one together. Plus once I got to thinking about it if I made the stencil by hand it would give it that made with love look. So I took a permanent marker and wrote out my “W”. Then I cut out the center and voila I had one big stencil.
I picked a shimmery gray color acrylic paint for the “W”. I thought about doing it in white but after thinking about it I didn’t want it to be too bold. With the gray you could see it but it was subtle plus it went well with the teal. I used a sponge brush to apply the paint and made sure not to have too much paint on it when applying. I taped the stencil down to hold it in place, there is nothing more that I hate then when you don’t secure the stencil and it moves then you to try and place it back. I pulled the stencil up as soon as I was done painting.
Once the paint was dry the fun part began putting it back together. I wanted to make sure it was nice and tight so I stapled it to the frame. I knew that the few nails on each side wouldn't get it tight enough. I then placed the nails back where they were. I did have to replace some of the old nails and I found replacements in my hubby's collection of fasteners. When I was all done I had a one of a kind piece of art for our home. The bonus of it was that I had made it by hand and with love!